A Guide to Recognizing the Causes of Hose Failure
When hydraulic or pneumatic hose fails in service, the cause usually can be attributed to either improper component selection, incorrect assembly procedure, poor installation practice, or any combination of these. Each failure mode provides some visual clues that can be traced back to a possible cause of the problem. And almost all of these failures are avoidable.
Following are a series of photographs showing some of the more common hose failures seen at the Hose Products Div. of Parker Hannifin Corp. Each photograph visually helps to identify the symptom, and the text suggests a possible cause and solution. If the problem can be recognized, it should be easier to prevent in the future.
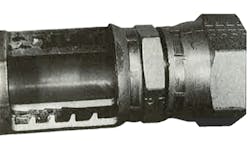
Problem 1: Fitting Blown Off Hose
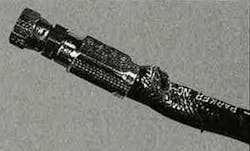
The fitting has blown off of the hose, which can cause a number of performance issues.
Cause: The hose was not inserted deeply enough into the shell of the fitting during assembly. All the grips in the shell are needed to hold the fitting onto the hose. In particular, the last grip in the shell is essential to developing the full holding strength of the fitting to the hose.
Solution: Replace the hose assembly. Mark the cover of the new hose per the recommended value stated in the catalog prior to inserting it into the fitting, then push the hose into the fitting until the end of the shell lines up with the mark. (Or use an insertion-depth gage, if available.)
READ MORE: Best-Practice Installation and Routing Ensure Long Hose Life
Problem 2: Hard and Brittle Hose
If hose becomes hard and brittle, and its cover cracks when flexed at room temperature, several issues can occur. The assembly may remain in its installed shape after being removed from the application. Additionally, the cover may show visible signs of being dried out and charred.
Cause: The hose was exposed to heat exceeding the maximum recommended temperature. The plasticizers in the elastomer that give the hose its flexibility have broken down or hardened. Aerated oils cause oxidation to occur in the inner tube of the hose, which can cause the hose to harden. Any combination of oxygen and heat will accelerate the hardening of the inner tube. Cavitation also may create the same effect.
Solution: Review the application. Reduce temperature of the fluid or ambient air to within the hose’s working limits, and/or replace the hose with one that has a higher qualified temperature rating. If ambient heat is the cause, install heat guards or shields as required, and replace the hose assembly. If high fluid temperature is the cause, evaluate the system design to improve its efficiency, or install a heat exchanger to reduce fluid temperature.
Problem 3: Leakage Between Fitting Shell and Hose
Another potential issue to watch for is a leak between the shell of a fitting and the hose. It is important to see if the fitting has blown off as this could be a reason for the leakage.
Cause: The shell of the fitting was crimped too much or too little during assembly.
Solution: Replace the hose assembly. Check for proper fitting usage and review instructions of the crimping machine being used — including the proper tooling.
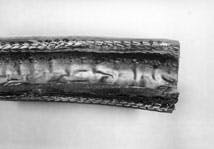
Problem 4: Hose Burst
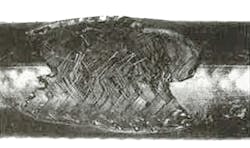
The hose has burst, and wire reinforcement has failed in the braid along the outside of the hose — with little, if any, outward deflection of wire in the failed area.
Cause: The hose exceeded its service life, perhaps as a result of a high number of pressure cycles or a continuous flexing of the hose in one area. This hose has simply outlived its useful life.
Solution: Review the application and replace the assembly.
Problem 5: Hose Leaks
The hose leaks (via pinholes or weepage) or bubbles (which may contain fluid) appear on the cover, near the fitting. Alternately, the hose has burst near the fitting with signs of corroded wire, but no obvious cover damage.
Cause: The inner tube of the hose was cut or damaged during fitting assembly, possibly due to a lack of proper lubrication. Improper assembly of the fitting allowed moisture to enter around the fitting’s socket, corroding the reinforcement wires.
Solution: Review the proper assembly techniques and replace the hose assembly.
Problem 6: Hose Cover Damage
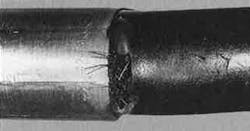
There is external damage to the hose cover, the hose has burst in an area of obvious twist, or there are broken wires in an area of failure.
Cause: The hose was twisted during assembly of the fitting, due to a lack of proper lubrication.
Solution: Review the proper hose assembly procedures. Replace the hose assembly and re-route it, adding clamps (if required). Use the hose layline as a guide to assure that the hose flexes in only one plane.
READ MORE: Hydraulic Hose Cover Protects Against Damage
Problem 7: Hose Burst
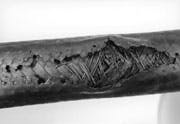
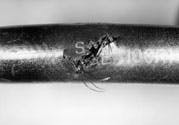
The hose has burst. The cover is torn and/or deteriorated, and reinforcement wires show signs of being rubbed, broken, or corroded.
Cause: There was excessive rubbing or chafing of the hose against some external object — possibly other hoses, sharp corners, brackets, or even the wrong size clamp.
Solution: Replace the hose assembly, and use a protective sleeve or hose guards. The hose assembly should be re-routed and, if required, the proper size clamps should be installed to prevent contact between hose and other objects.
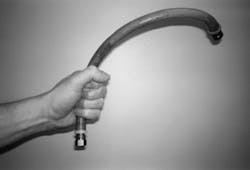
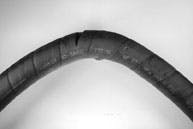
Problem 8: Hose Burst on a Bend
The hose has burst at the outside of a bend. It has set (usually oval-shaped), and it remains in the bent position — yet it still is flexible. There may be some broken wires in the area of failure on the outside bend of the hose. If the application is under vacuum or suction, the hose may tend to be flattened out in the area of the bend, which may hinder or restrict the flow. If the bend is severe enough, the hose may exhibit a kink.
Cause: The recommended minimum bend radius was violated, or a bend occurred very close to the fitting.
Solution: Replace the hose assembly, and re-route it to increase the bend radius to within the manufacturer’s requirements. The hose should not begin to bend for a minimum distance of two times the hose ID from the fitting, and then stay within minimum bend requirements. Use the proper clamps as required.
Problem 9: Deteriorated Inner Hose Tube
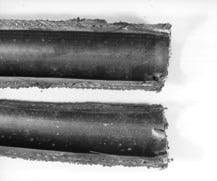
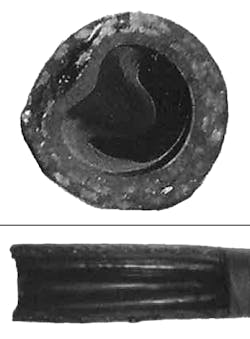
The inner tube of the hose is badly deteriorated. It may show signs of swelling and delamination. In some cases, the inner tube may be partially washed out.
Cause: The fluid is incompatible with the inner tube material.
Solution: Replace the hose assembly with a hose that is compatible with the fluid being used, or replace the fluid with one that is compatible with the hose material.
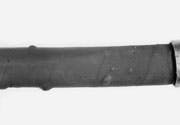
Problem 10: Multiple Hose Cover Blisters
There are numerous hose cover blisters. The inner tube and/or the cover of the hose appears swollen and has softened.
Cause: There is a fluid incompatibility with the hose materials. The blisters may contain fluid or a grease-like substance, which may be a combination of the system’s fluid and the plasticizers in the hose.
Solution: Replace the hose assembly with one constructed from materials that are compatible with the fluid, or replace the fluid with one that is compatible with the hose.
READ MORE: Stop High-Pressure Leaks with Flanges
Problem 11: Fine Cracks on Pneumatic Hose Inner Tube
The inner tube of a pneumatic hose contains numerous fine cracks, but remains flexible. No cracks are found in the hose under the fittings.
Cause: The internal air of the system is too dry. This may be due to the use of an aggressive air drying system.
Solution: Replace the hose assembly with one that is rated for extremely dry air or raise the dewpoint of the air, if warranted by the application.
Problem 12: Cracks on Inner Tube or Hose Cover
The inner tube and/or the hose cover has cracks, but it is soft and flexible at room temperature.
Cause: The hose was exposed to temperatures below its recommended limits.
Solution: Review the application. Raise temperatures to within the boundaries specified or replace hose with one recommended for the lower temperature parameters.
Problem 13: Clean Hose Burst
The hose has burst in a clean fashion, with no random wire breakage and no sign of wire-on-wire abrasion or cover abrasion.
Cause: There were excessive pressures or pressures in the range of the minimum burst rating for the hose.
Solution: Adjust the system pressure to be within the established working pressure of the hose, or replace it with a hose that has a higher working pressure.
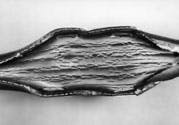
Problem 14: Restricted Hose Bore
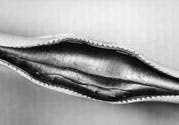
The hose bore appears restricted. The tube may be torn or broken loose from the reinforcement and piled up at the end of the assembly, resulting in a reduced flow or blockage. The outside of the hose may show signs of being flattened.
Cause: There was a vacuum failure. The hose may have been kinked, flattened, or bent too sharply.
Solution: Replace hose with one rated for the vacuum application.
Problem 15: Hose Leaks Through Cover
The hose leaks profusely through the cover, and the inner tube exhibits gouges through to the wire braid along several inches of its length.
Cause: The hose’s inner tube has eroded, due to high-velocity fluid, emitted from an orifice, striking the inner tube. Particles in the fluid may also cause erosion.
Solution: The hose assembly may be bent too tightly for flow — or the fluid medium is too abrasive for the hose’s inner tube. Replace the hose assembly.
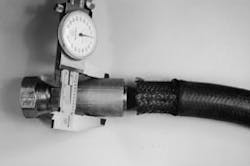
Problem 16: Hose Burst at Fitting
The hose has burst at the fitting, with broken wires at the last shell grip, or at the end of the nipple.
Cause: The hose was moving within — or pulling at — the fitting. This excessive movement may be the result of pressure surges, or an indication that the length of the hose assembly was too short. Other causes: the hose bend starts too close to the fitting, or there is an incorrect crimp dimension.
Solution: Lengthen or re-route the assembly to allow for some slack — never stretch to fit. Assemblies may shorten by as much as 4% when pressurized. Thus, the hose should be routed straight for at least two times its ID before starting to bend. Clamp the assembly as necessary to avoid movement. Review crimping techniques and proper tooling, and replace the hose assembly.
Conclusion
Implementing an ongoing inspection and maintenance program is well worth the time and effort. Doing so will help you learn from premature failures, to prevent them in the future. Some locations may require a monthly inspection, while others may need more frequent inspection. Operating conditions for hose on machinery can vary tremendously — even within the same plant. There probably will be differences in operating pressures, pressure-cycling, fluid temperatures, or even fluids. Thus, the people best qualified to accurately assess how often to check the equipment are usually the people on site.
Due to the wide variety of operating conditions and uses for hose and fittings, Parker and its distributors do not represent that any particular hose or fitting is suitable for any specific end-use system. This general guide does not analyze all technical parameters that must be considered when selecting a product. The user — through such analysis and testing — is responsible for making the final selection, assuring that it presents no health or safety hazards, and providing appropriate warnings on the equipment where it will be used.
This article was written and contributed by Ron Mramor, Technical Services Engineer for Parker Hannifin's Fluid Connector Group.
